To repair a damaged thread, you will need a thread repair kit containing various useful tools such as twist drill, special taps, insertion tools for threaded inserts, as well as Helicoil stainless steel thread inserts.
Depending on the nature of the initial problem and the type of thread, various repair methods are possible. One possible option is a repair kit.
At Gardette, we split thread repair kits into two categories:
The most common causes of thread breakage include:
Whatever your case may be, if the thread is damaged, sheared or deformed, it can be fixed using a thread repair kit!
Our mixed thread repair workshop kits contain:
Thread repair workshop kits - Free Flowing
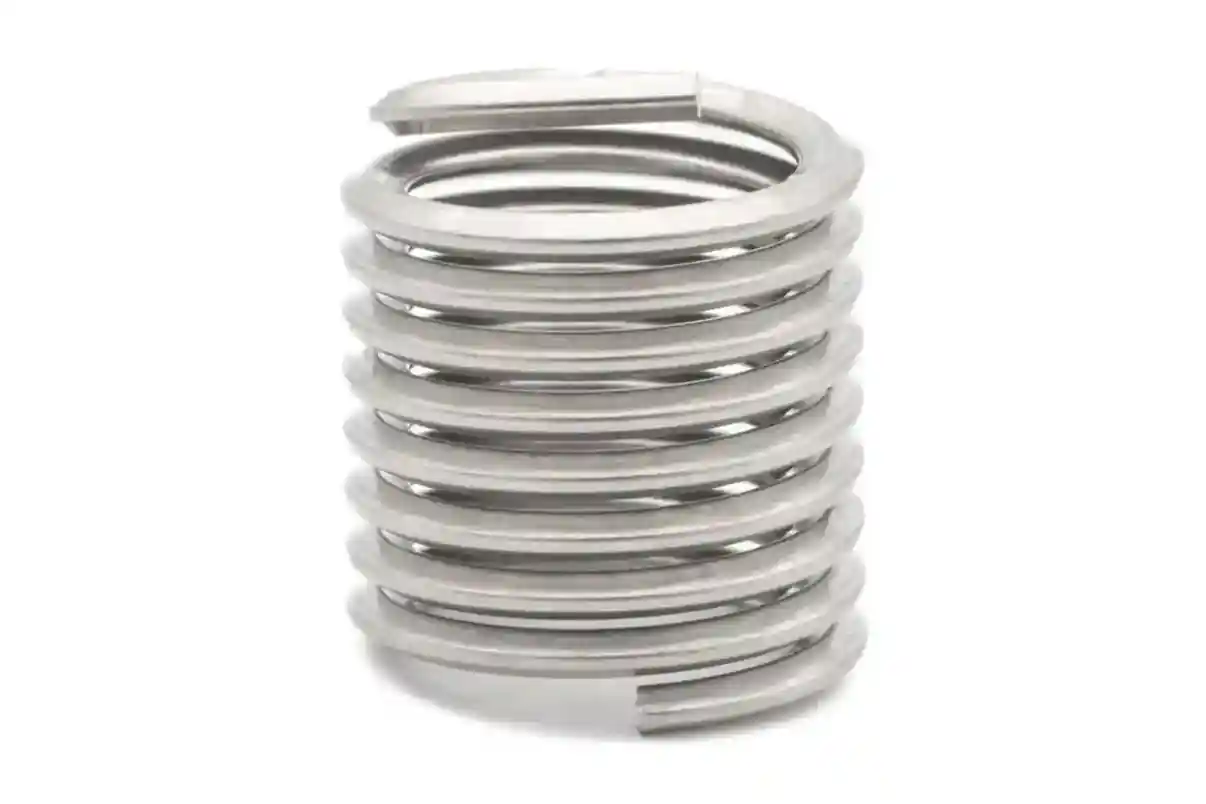
The classic Helicoil insert, compatible with UNC, UNF, BSW, BSF G (BSP), BA and NPT threads.
Single height kits and three-height kits available. From M2 to M42.
Thread repair workshop kits - Screw Grip
The Screw Grip threaded insert offers superior resistance to shocks, vibration and movement. It can be distinguished from other threaded inserts thanks to its red colour. We recommend using it only in applications where high strength is required.
Thread repair workshop kits - spark plug
To repair a spark plug thread, it is not necessary to drill a central hole. That's where the HSSG combined drilling and cutting tool comes in - in a single go, the hole is widened by the nose and the thread is cut with an allowance. These thread repair workshop kits for spark plugs are available in four different lengths:
Thread repair workshop kits - oil drain plug
To repair an oil drain plug thread, use a twist drill bit to cut through the damaged thread. Then, if necessary, use a countersink bit to widen the hole.
These tools can all be found in our thread repair workshop kits for oil drain plugs, available in three different lengths:
Thread repair workshop kits - Pro machine
The PRO thread repair workshop kits contain Helicoil thread inserts ranging from 1.5 D to 2.5 D in length, perfectly suited to most needs.
These kits also include a HSS countersink bit and a machine installation tool compatible with cordless screwdriver bits. With the PRO machine thread repair kits, you will be able to screw in your threaded inserts safely and effectively.
Our thread insert repairs can be installed manually or using a cordless screwdriver. Here's how:
For manual tapping
For machine tapping

To repair a damaged thread, you will need a thread repair kit containing various useful tools such as twist drill, special taps, insertion tools for threaded inserts, as well as Helicoil stainless steel thread inserts.
Depending on the nature of the initial problem and the type of thread, various repair methods are possible. One possible option is a repair kit.
At Gardette, we split thread repair kits into two categories:
The most common causes of thread breakage include:
Whatever your case may be, if the thread is damaged, sheared or deformed, it can be fixed using a thread repair kit!
Our mixed thread repair workshop kits contain:
Thread repair workshop kits - Free Flowing
The classic Helicoil insert, compatible with UNC, UNF, BSW, BSF G (BSP), BA and NPT threads.
Single height kits and three-height kits available. From M2 to M42.
Thread repair workshop kits - Screw Grip
The Screw Grip threaded insert offers superior resistance to shocks, vibration and movement. It can be distinguished from other threaded inserts thanks to its red colour. We recommend using it only in applications where high strength is required.
Thread repair workshop kits - spark plug
To repair a spark plug thread, it is not necessary to drill a central hole. That's where the HSSG combined drilling and cutting tool comes in - in a single go, the hole is widened by the nose and the thread is cut with an allowance. These thread repair workshop kits for spark plugs are available in four different lengths:
Thread repair workshop kits - oil drain plug
To repair an oil drain plug thread, use a twist drill bit to cut through the damaged thread. Then, if necessary, use a countersink bit to widen the hole.
These tools can all be found in our thread repair workshop kits for oil drain plugs, available in three different lengths:
Thread repair workshop kits - Pro machine
The PRO thread repair workshop kits contain Helicoil thread inserts ranging from 1.5 D to 2.5 D in length, perfectly suited to most needs.
These kits also include a HSS countersink bit and a machine installation tool compatible with cordless screwdriver bits. With the PRO machine thread repair kits, you will be able to screw in your threaded inserts safely and effectively.
Our thread insert repairs can be installed manually or using a cordless screwdriver. Here's how:
For manual tapping
For machine tapping

We are certified to IATF 16949 and ISO 9001 standards.
In all our offers & confirmation messages, we explicitly mention the goods' shipping date(s).
Our sales team is available:
From Monday to Thursday 8:30a.m.-12:00p.m. & 1:30p.m.-5:00p.m.
Fridays 8:30a.m.-12:00p.m. & 1:30p.m.-4:30p.m.
We are committed to Corporate Social Responsibility (CSR) and plan to obtain ISO 14001 and ISO 45001 certifications in the near future.
We are currently putting together a multidisciplinary group with the aim of helping us reduce our carbon footprint. As part of this initiative, we carried out a complete carbon assessment (Scopes 1, 2 and 3) in 2023, allowing us to examine our overall environmental impact.